84 lines
2.5 KiB
Markdown
84 lines
2.5 KiB
Markdown
# 开始
|
|
|
|
## 架构相关
|
|
|
|
### 依赖
|
|
|
|
- `tun_tap`: 创建低级网络设备的`crate`。
|
|
- `tshark`: `wireshark`的终端版本,安装`wireshark`自己会带。
|
|
- `etherparse`:用来解析`Tcp`和`IP`部分,并且提供了简便访问成员的封装。
|
|
|
|
### 传输链路
|
|
|
|
```mermaid
|
|
graph LR
|
|
A[TUN 接口] --> B(接收 IP 数据包);
|
|
B --> C{解析 IP 数据包};
|
|
C --> D[解析 TCP 头部];
|
|
D --> E[解析 TCP 数据体];
|
|
E --> F{你的逻辑处理};
|
|
F --> G[构造 IP 数据包];
|
|
G --> H[包装 TCP 结构];
|
|
H --> I(通过 TUN 发送);
|
|
I --> A;
|
|
|
|
style A fill:#f9f,stroke:#333,stroke-width:2px
|
|
style I fill:#3e89,stroke:#333,stroke-width:2px
|
|
style F fill:#05aa20,stroke:#333,stroke-width:2px
|
|
|
|
classDef process fill:#fffff,stroke:#ffff,stroke-width:1px
|
|
class C,D,E,G,H process
|
|
```
|
|
|
|
使用`TUN`模式进行低级网络传输。我们从`NIC`中获取到的是一个`IP`数据包。
|
|
|
|
具体流程,我们需要先解析这个`IP`数据包,然后解析其中的数据,将它作为`TCP`进行解析,最终我们将我们的数据包装为`IP`数据包,然后传输到`TUN`中,实现通信。
|
|
|
|
### 项目测试
|
|
|
|
我们在`example/bin.rs`中编写我们的启动测试主程序。`tests`目录主要是用来编写单元测试。
|
|
|
|
```bash
|
|
#!/bin/bash
|
|
cargo build --example bin -r
|
|
ext=$?
|
|
if [[ $ext -ne 0 ]]; then
|
|
exit $ext
|
|
fi
|
|
sudo setcap cap_net_admin=eip ./target/release/examples/bin # 赋予程序网络控制权限,因为要创建tun接口
|
|
./target/release/examples/bin &
|
|
pid=$!
|
|
echo $pid
|
|
sudo ip addr add 192.168.0.1/24 dev mytun0 # 为我们的虚拟网卡绑定IP和掩码
|
|
sudo ip link set up dev mytun0 # 激活设备
|
|
trap "kill $pid" INT TERM
|
|
wait $pid
|
|
```
|
|
|
|
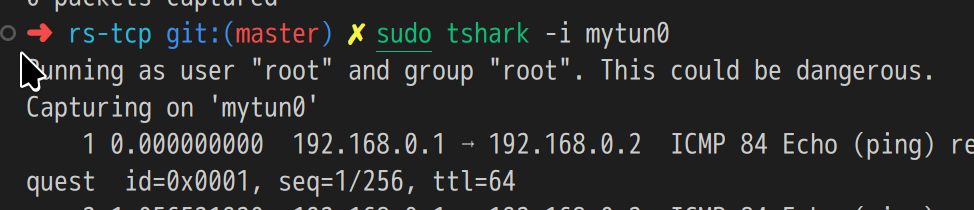
#### 抓包
|
|
|
|
```bash
|
|
sudo tshark -i mytun0 # 使用tshark监听mytun0设备
|
|
```
|
|
|
|
|
|
|
|
## 开始编写
|
|
|
|
### 滑动窗口
|
|
|
|
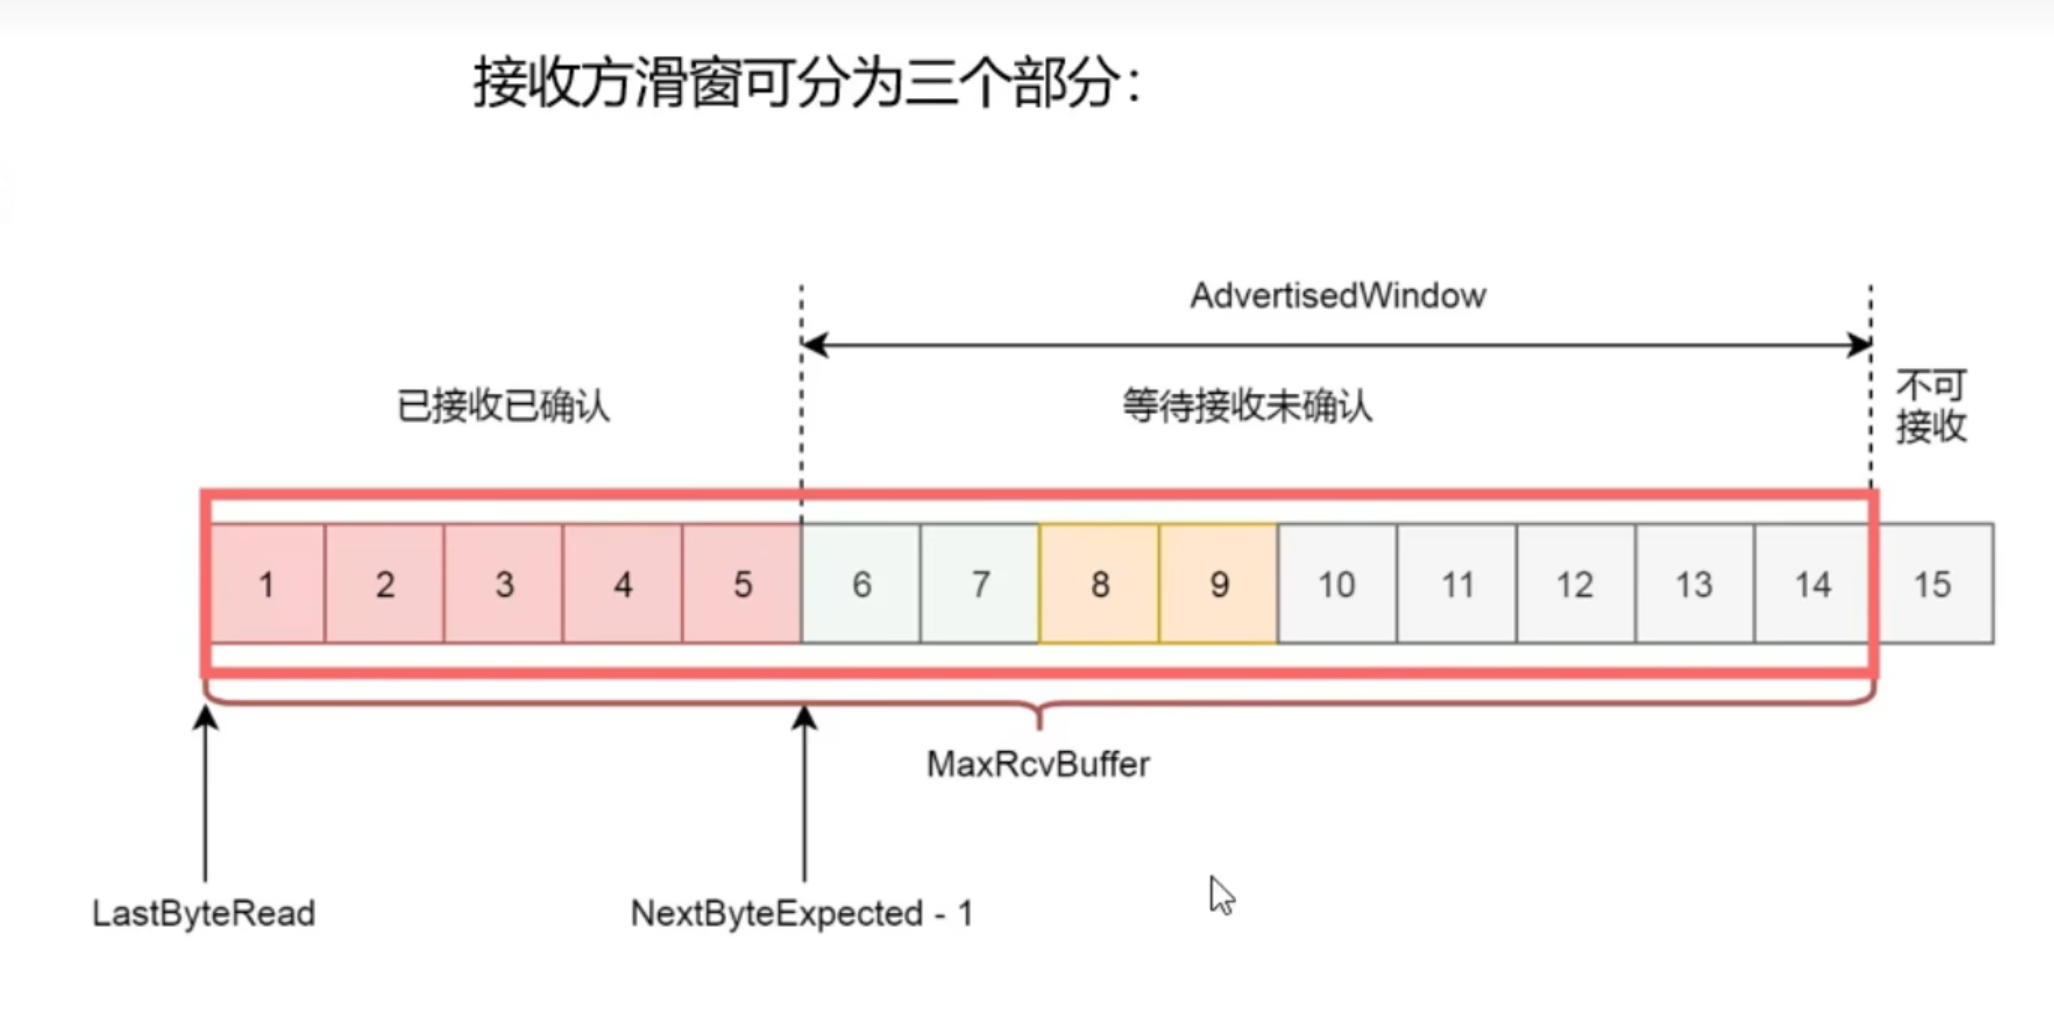
**接受方滑动窗口**
|
|
|
|
|
|
|
|
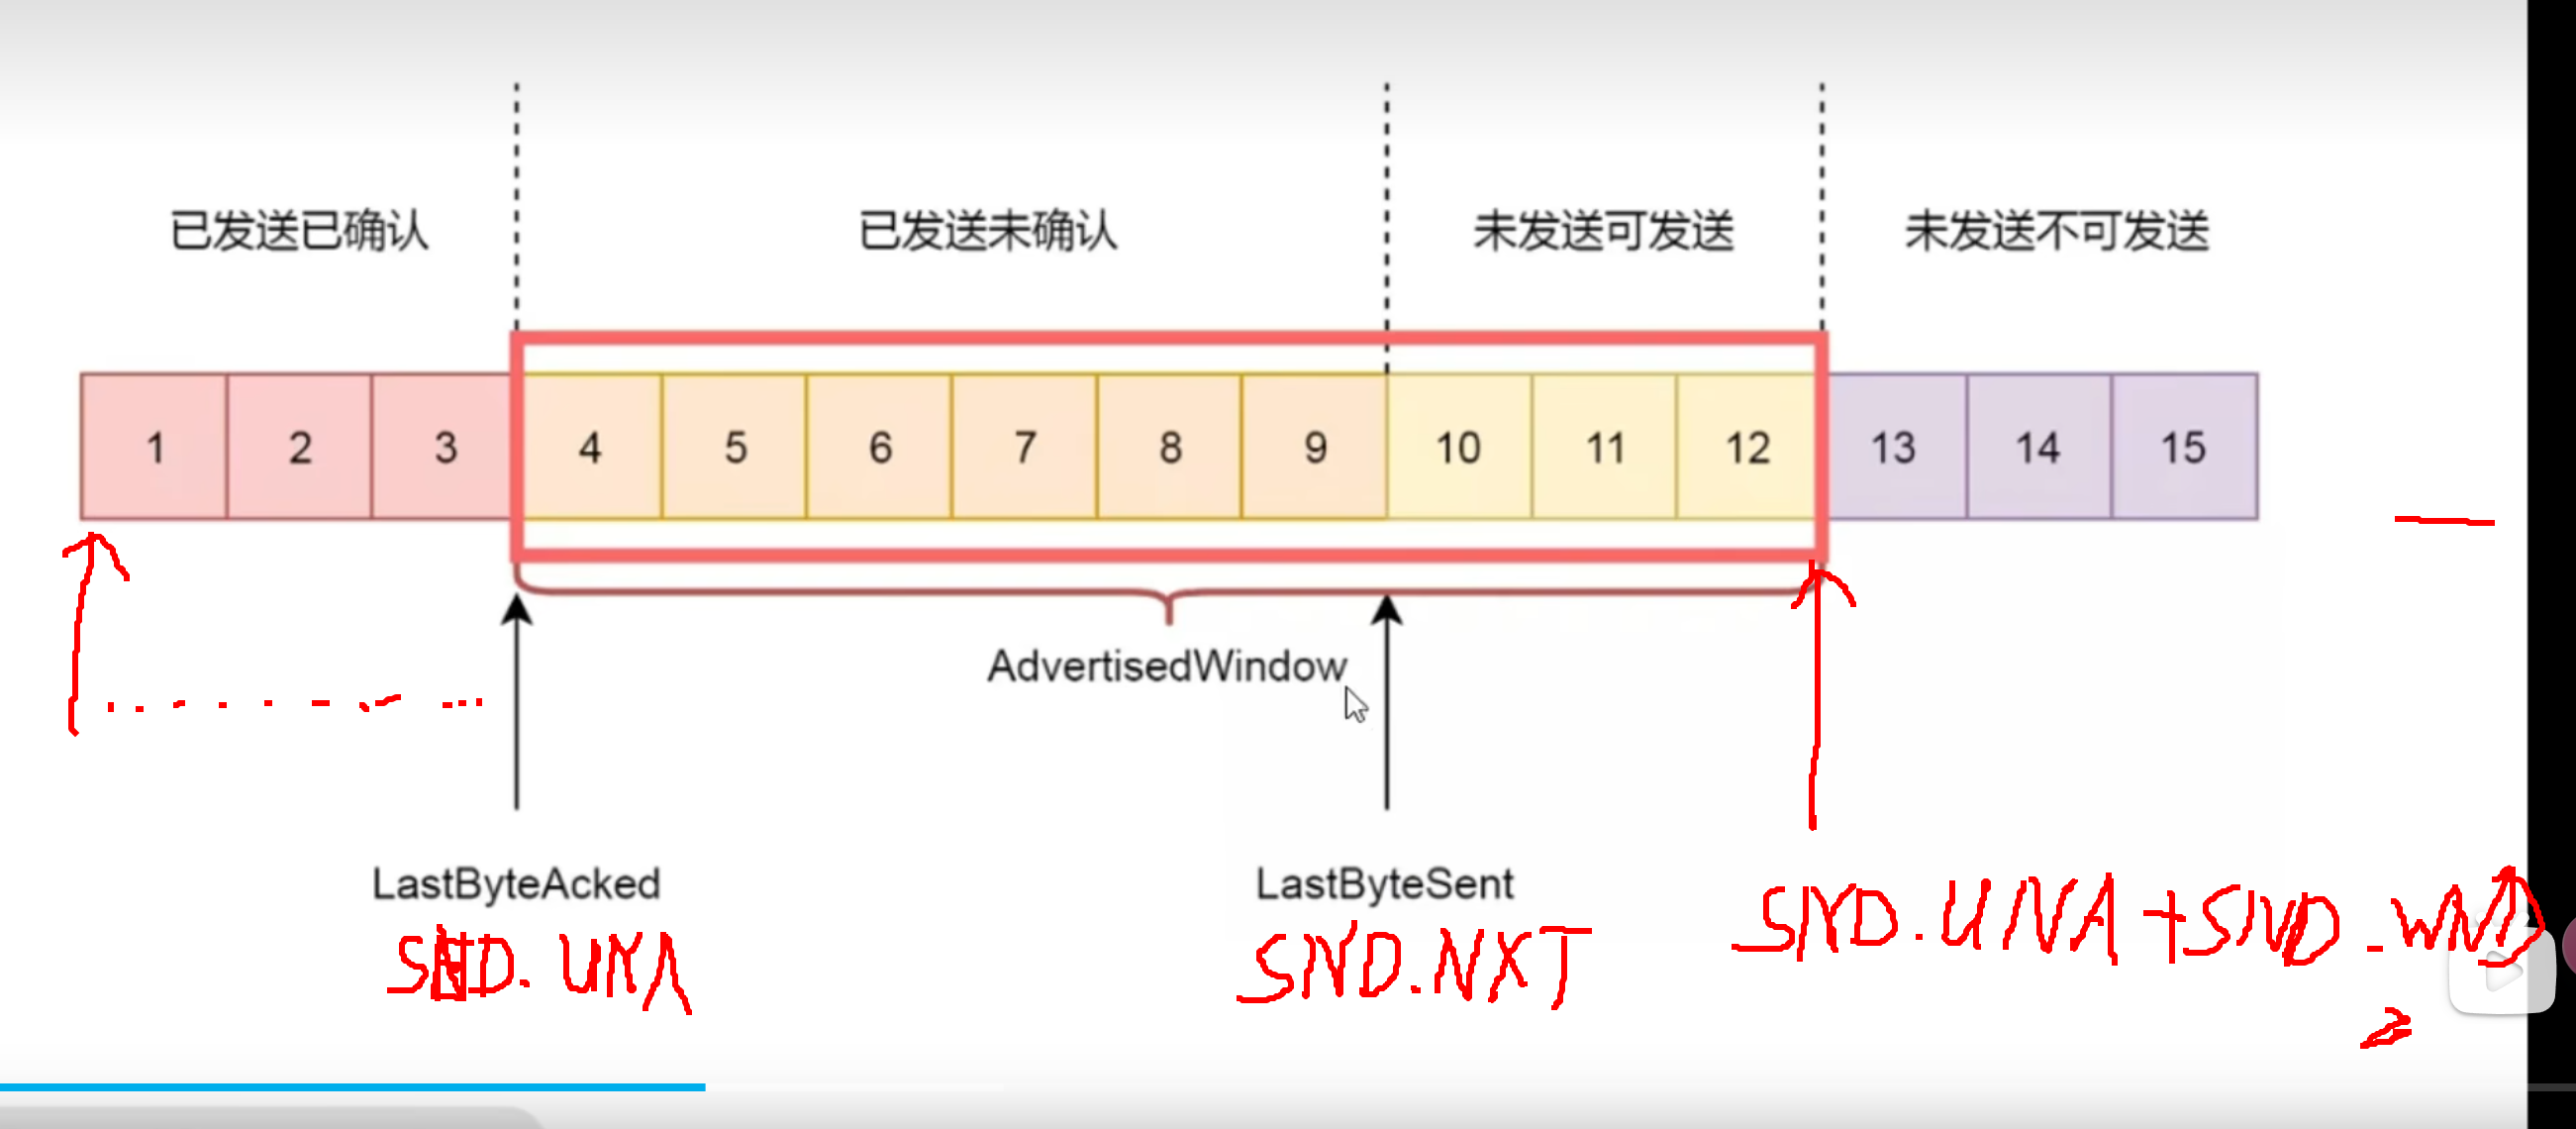
**发送方滑动窗口**
|
|
|
|
|
|
|
|
---
|
|
|
|
当发送方接收到`ACK`后,会将`SND.UNA`向右移动。
|
|
|
|
而接收方接收到数据包后,会连续的将`RCV.NXT`向右移动,当遇到丢包,就会触发重传。
|
|
|
|
需要注意,发送方和接收方都存在窗口大小,当发送方发送消息时,同时收到`接收方滑动窗口大小`和`自身窗口大小`的限制。 |